How to Add Social Media Icons
In this article, we will walk you through how to add and remove social media links on your website.
Step 1: Go to Settings
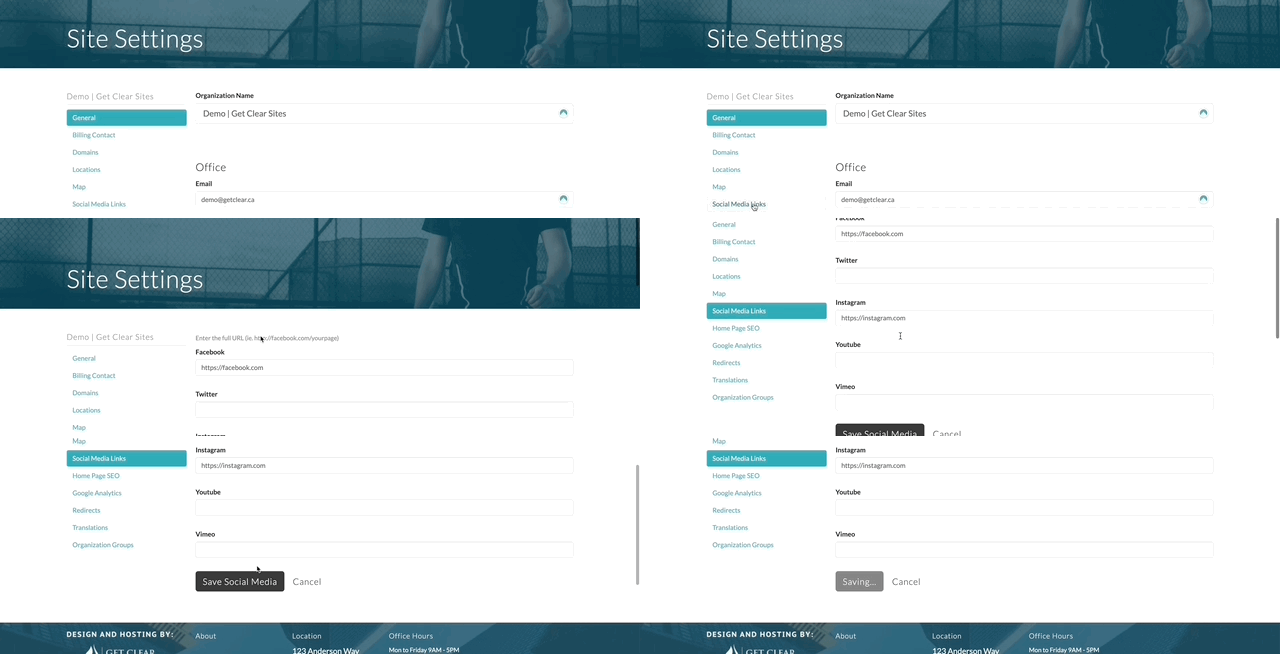
While logged in, Click the "Admin" button in the top right of your screen and select "Settings" in the dropdown menu.

On the left-hand side of the screen, you will see a link called Social Media Links. Click on that link to access the social media settings page.

Step 2: Add or Remove Links.
On the social media settings page, you can add or remove links to any of your social media accounts. For example, if you have a LinkedIn account, you can add a link to it by clicking on the "Add a link" button and entering the URL for your LinkedIn profile.
If you want to remove a link, simply delete the link and save your changes.
Step 3: Save Changes.
Once you have added or removed your social media links, be sure to click on the "Save Social Media" button to save your changes.
Step 4: Check Your Website
After you have saved your changes, check your website to ensure that the social media links are appearing in the correct locations. Depending on the design settings of your website, social media links can appear in the Topbar, or footer of your site.
Step 5: Customize Appearance.
If you want to customize the appearance of your social media links, you can do so by navigating to your Site Settings area. While logged in, Click the "Admin" button in the top right of your screen and select "Design" in the dropdown menu.
Then navigate to your "Footer" settings on the left. Here, you can toggle on or off the social media icons in the Topbar or Footer, depending on your preferences.
If this article didn't completely answer your question, or if you have any other questions, email us at anytime at support@clinicsites.co and we'll be more than happy to help you out!
