
How to Change the Font on your Website
Fonts play a crucial role in setting the tone and brand of your website. In this article, we'll show you how to select and adjust fonts on your website.
Step 1: Access the Site Design Settings.
First, access the Admin area of your website and click on the "Design" option. This will take you to your site design settings.

Step 2: Select Font Settings.
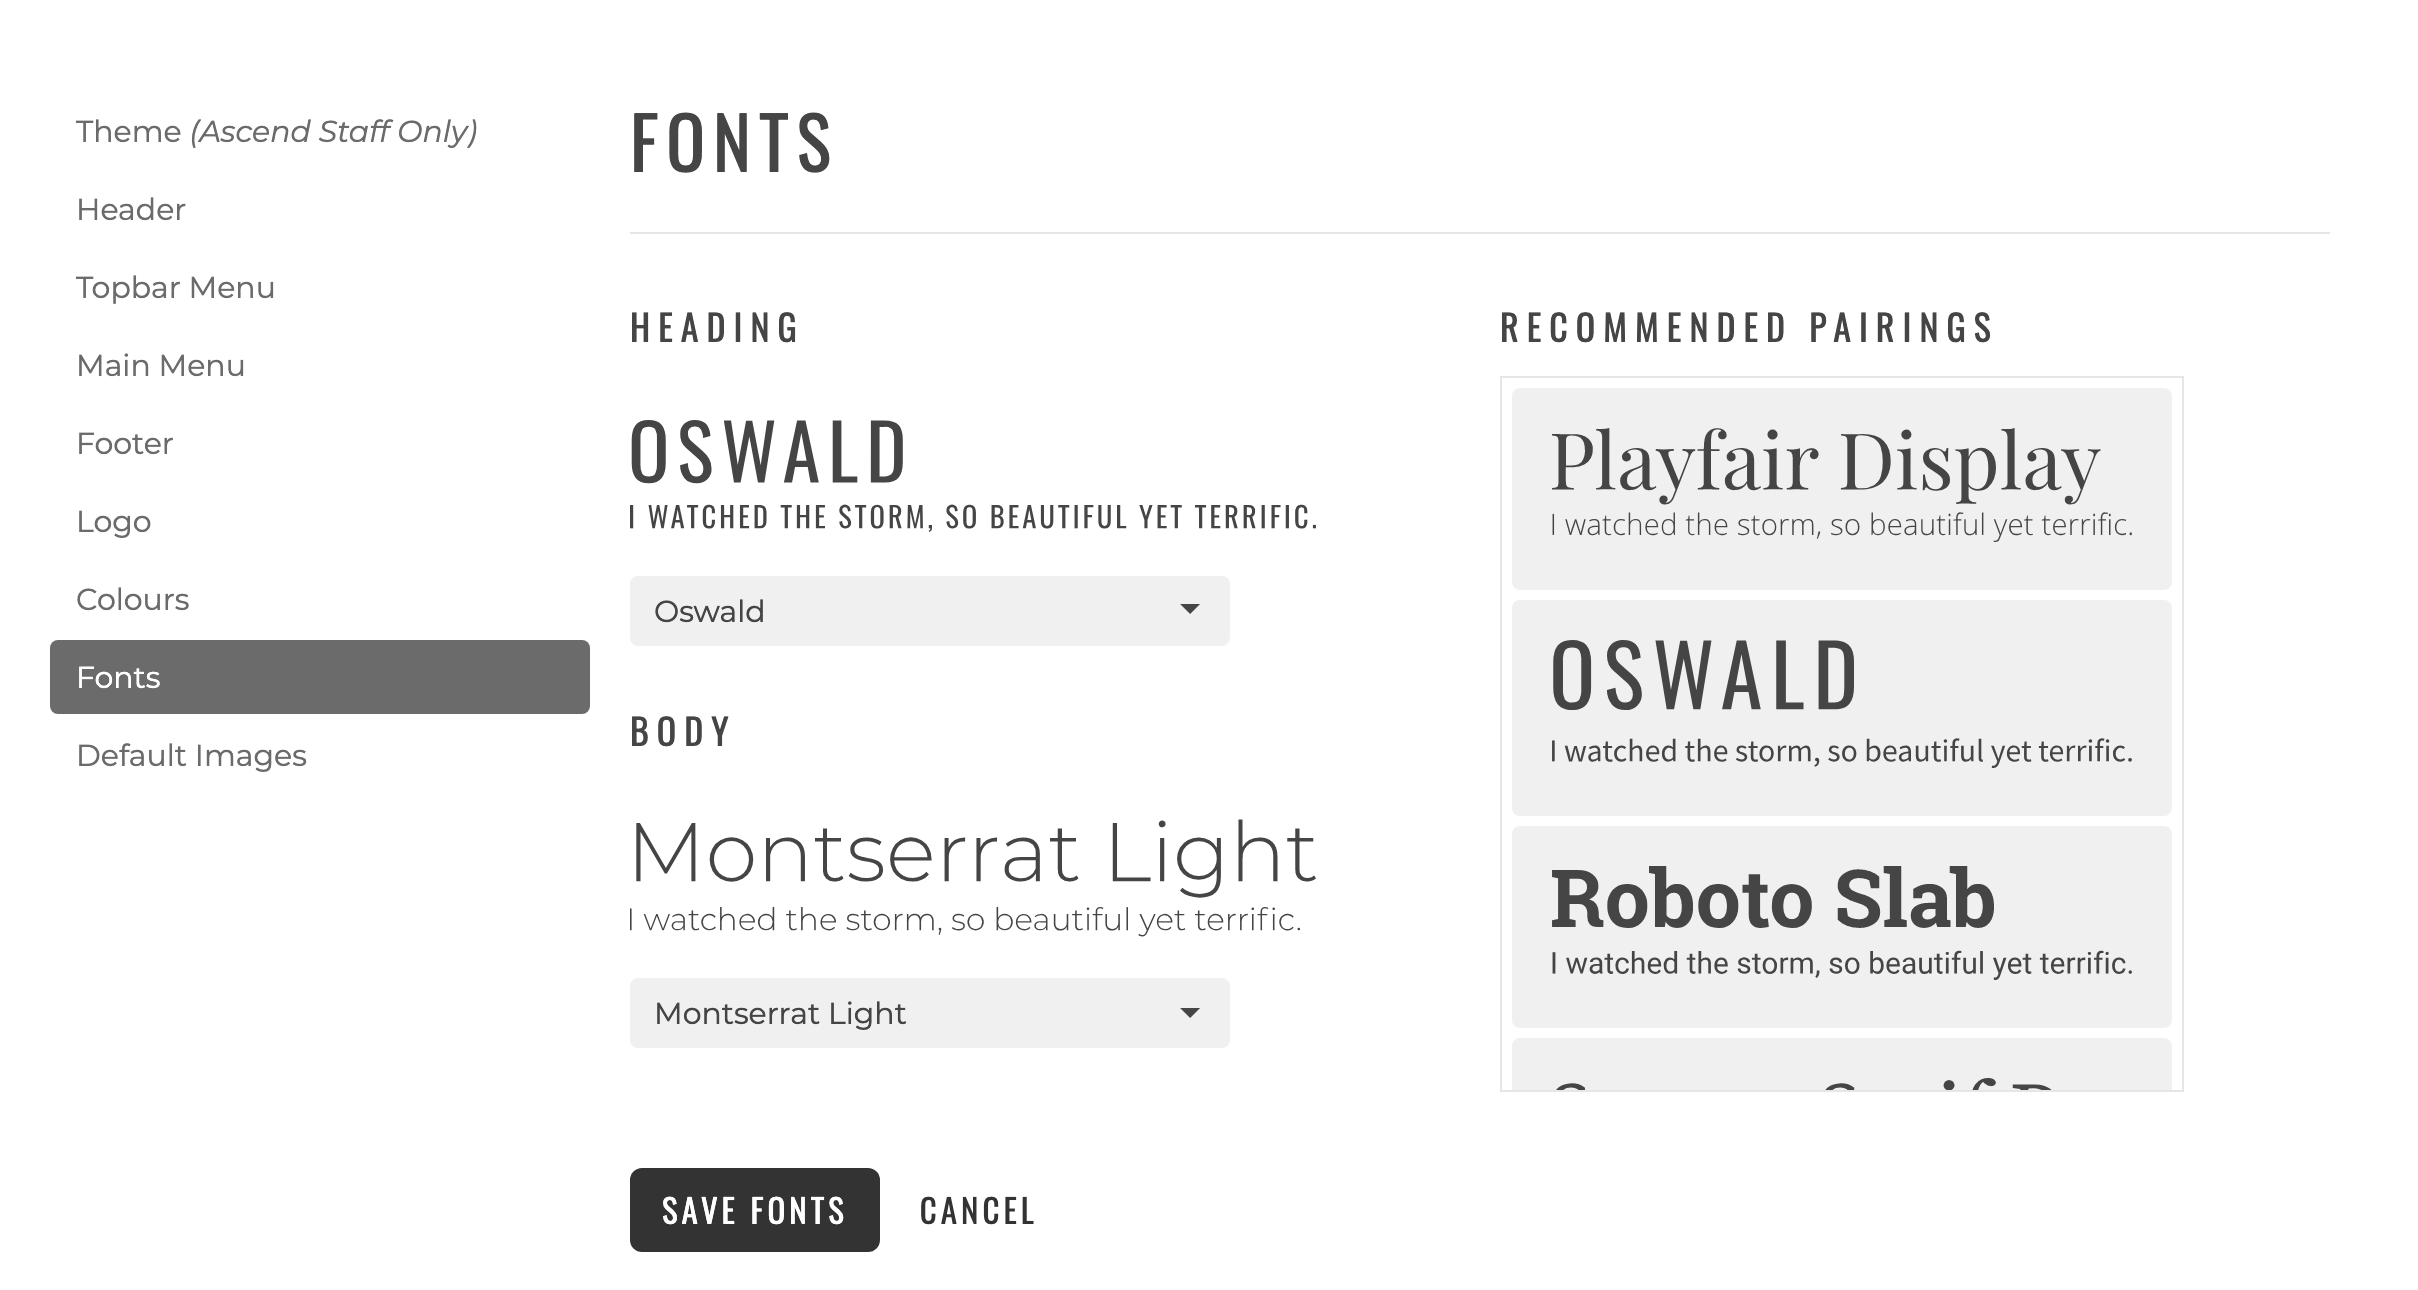
On the left side of the site design settings, you'll find an option to select fonts. Click on this option to open the font settings.
Step 3: Adjust Heading and Body Fonts.
Within the font settings, you'll see two different areas of fonts you can adjust: heading fonts and body fonts. The heading font is used for headlines throughout the website, while the body font is used for sentences and paragraphs of text.
Step 4: Preview Fonts.
To preview the different font options available, click on each one. This will give you a preview of what the font looks like.
Step 5: Choose a Font Set or Individual Fonts.
On the right side of the font settings, you'll see some recommended font pairings chosen by our team. You can choose from one of these or select individual fonts that you like.
Step 6: Save Your Font Settings.
Once you've made your selection, click on "Save Fonts" to update the font settings for your entire website.
Step 7: Experiment with Different Font Pairings.
You can come back to the font settings anytime to experiment with different font pairings for your website. This way, you can easily choose and adjust the fonts on your website to create a unique and professional look that aligns with your brand.